Privacy for screenshots
Hide private details in a screenshot: why blur is not enough
Quick answer: cover the private part with a solid, fully opaque box and save the result as a new file. Blur, pixelation and see-through highlighters keep traces of what is underneath, and some of them can be reversed. Open the redaction tool, enter the area to cover, check the result and share only that copy. It runs in your browser; your screenshot is not uploaded to Refentra.
Files are processed locally.
On this page
Why blur and pixelation are not safe
Blurring and pixelating do not remove information, they mix it. The mix follows a fixed rule, so for short pieces of text (a number, a name, a password) the original can sometimes be worked out again. Security researchers have published tools such as Depix that rebuild text from pixelated screenshots when the font and the pixelation method are known. A faint blur is no better: it only looks safe to the eye.
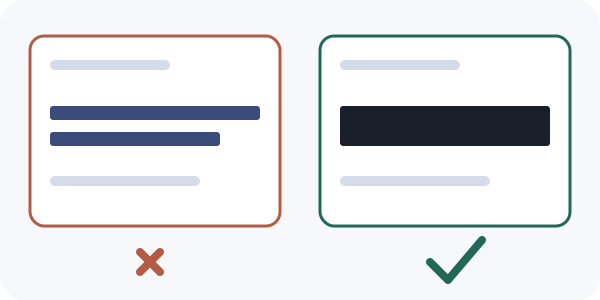
- Blur or pixelate
- Original can sometimes be reconstructed. Use only for low-stakes things.
- Semi-transparent marker or box
- The pixels underneath are still there, just darker.
- Black shape added as a layer
- Safe only if the layers are flattened. A layered file or a PDF can keep the text underneath.
- Cropping
- Looks final, but in 2023 the Pixel Markup tool and the Windows Snipping Tool were found to leave parts of the cropped-away image inside the saved file (aCropalypse). Both were fixed by updates.
- Opaque box burned into the pixels of a new file
- The hidden pixels are gone from the copy you share. This is what the tool below does.
Sources: Depix on GitHub and aCropalypse on Wikipedia, checked 5 October 2026. Refentra is not affiliated with these projects.
How to cover private details in five steps
- Keep the original and decide what must go. Typical candidates: names, e-mail addresses, phone numbers, home addresses, account, order and tracking numbers, IBANs, API keys and tokens, QR codes, barcodes, faces, number plates, browser tabs, notification banners and the address bar.
- Find the pixel coordinates. The tool asks for left (X), top (Y), width and height in pixels. Open the screenshot in an editor that shows the cursor position (Windows Paint shows it in the status bar), note the top-left corner and the size of the area, and add about 10 px of margin on every side. Text ascenders and descenders are easy to cut off.
- Open the redaction tool and choose the screenshot. It accepts one still JPG, PNG or WebP up to 25 MiB and 16 megapixels. Enter the four numbers and select Add rectangle. You can add up to 20 areas.
- Apply the redaction and download. The tool paints the areas opaque black, checks the pixels of the result and only then offers the download. The result is a PNG; metadata of the source file is not carried over.
- Check the file you will share. Open the downloaded copy at 100 % zoom and look at every corner. Anything you missed is still readable. Then send or post only this copy.
Mistakes that give the secret away anyway
- Hiding a name in the main text but leaving it in the browser tab title, the address bar, a notification or the file name.
- Covering only part of a number. Leave out the last four digits and the first digits are still guessable from context.
- Using a box that is a little too small. Descenders (g, j, y), accents and the edge of the last character often stick out.
- Sharing the redacted copy together with the original, for example in the same e-mail or the same cloud folder.
- Taking a new screenshot of a redacted PDF viewer and assuming the text layer is gone. Only the pixels you share count.
PDFs and text you can copy
A black rectangle drawn on top of a PDF page does not delete the text below it; anyone can select and copy it. The tool on this page works on images only. For a document, use a PDF editor with a real redaction function that removes the content, or export the page as an image, cover it here and rebuild a PDF with images to PDF. The result then contains only pixels.
What the tool does not do
- It does not find faces, text or numbers for you. It covers exactly the rectangles you enter.
- It outputs a PNG, so a very large photo can become a larger file than the JPG it started as.
- It does not touch the original file or other copies, thumbnails and previews that already exist elsewhere.
- If you only need to remove location and camera data from a photo, use the metadata guide instead.
Sources and method
Background facts come from the linked pages, checked on 5 October 2026. The steps and the limits were checked against the current Refentra redaction tool. Refentra does not see your file: it is processed in your browser. This guide was drafted and edited with AI assistance.