Documents and forms
Signature as a transparent PNG: from a paper photo to your document
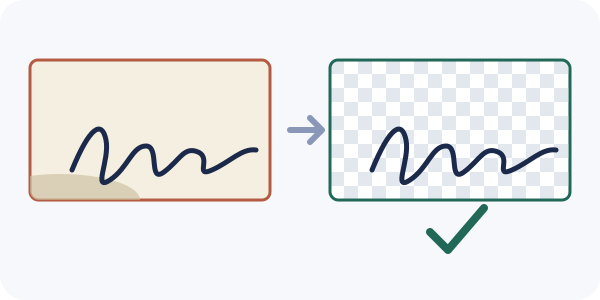
Quick answer: sign on plain white paper with a dark pen, photograph it straight from above in even light, crop tightly, then remove the paper with the background tool and download a PNG. A PNG keeps the see-through background, so the signature sits on any document without a white box around it. Everything runs in your browser; your signature is not uploaded to Refentra.
Remove a solid image background
Open tool →Files are processed locally.
On this page
Before you take the photo
- Use plain white paper without lines and a dark pen with a solid line (gel or felt-tip works better than a thin ballpoint).
- Take the photo in daylight or under an even lamp. Hard shadows across the paper later look like part of the signature.
- Hold the phone parallel to the paper, directly above it, with the flash off. A tilted photo distorts the strokes.
- Sign three or four times and keep the best one. Fill the frame with the paper and leave a small empty margin around the signature.
Turn the photo into a transparent PNG
- Crop to the signature. Open the image cropper and cut away everything except the signature and a little paper. The background tool accepts images up to 10 MiB and 8 megapixels, so a full phone photo is often too large; cropping also removes table edges.
- Open the background tool and choose the cropped image. Under “Background corner” pick a corner that shows only paper.
- Set “Color tolerance”. Start low and raise it step by step until the paper, including its faint shadows, disappears while the pen strokes stay. Select “Preview removal”.
- Check the preview on the checkerboard. Zoom in on thin strokes and edges. When it looks right, tick “I checked the subject and edges in the preview” and select “Download PNG”.
- Insert the PNG into your document. Word processors, presentation tools and many PDF editors have an Insert → Image (or Picture) command; a PNG keeps its transparent background there.
If the result does not look right
- A grey or white fringe around the strokes: the photo had shadows or JPEG blur. Raise the tolerance slightly, or retake the photo in even light with a darker pen.
- Thin strokes disappear: the tolerance is too high. Lower it until the pen line stays whole.
- “More than 85 % would be erased”: you chose a corner that touches ink or a dark shadow. Pick another corner or crop so that all four corners are paper.
- White spots inside loops: the tool removes only paper connected to the chosen corner. Paper enclosed by a letter (inside an “o”, for example) stays. On a white page nobody sees it; on a coloured background, check those spots first.
- Lines, stamps or a printed form behind the signature: this tool cannot tell them apart from the signature. Sign on blank paper instead.
Use it with care
- Never post your signature image publicly and send it only to people who need it.
- If you must send the image on its own, you can add a visible line such as the recipient and date with the watermark tool. Do not use that copy inside a document, because the text would print with it.
Sources and method
Steps, labels and limits (10 MiB, 8 megapixels, connected background only, 85 % safety stop) were checked against the current Refentra background tool. The note on acceptance is general: Refentra does not state legal requirements for any country. This guide was drafted and edited with AI assistance.